The Ziggy~Licious action set now available for purchase....
Wow..it's been a long couple months from when I first started thinking of the ideas for this set to the final product. It's been a great journey and I learned a lot about myself in the process which is always great!
This set will work in Photoshop CS2 & for for PC & MAC but is not compatible in PSE. Sorry!
So first off, if you haven't seen the Sneak Peek take a look and see what this set is capable of when mixing and matching actions from the set!
I was very lucky to have a lot of fabulous women send in images for testing and the examples that you will see on this blog. To all of you...thank you! You made this post much more beautiful than if I had to fill it with all of my own images! :O)
This set has 22 actions included. It is meant to give you a tonal shift in colors and a slight haze while keeping detail in your images and your whites still white! Your skin tones will get a slight shift as well, but remain natural!
When you purchase the set a pdf file will be included which will go over the basics of the actions, how they are set up and how to get the most out of them!
I am really proud of this set and use it on most of my images now! It's exactly what I was missing in my panel and I hope you feel the same way! So...let's get on with the show...
The set is broken down into 5 sections. Here is the list of actions you will receive...
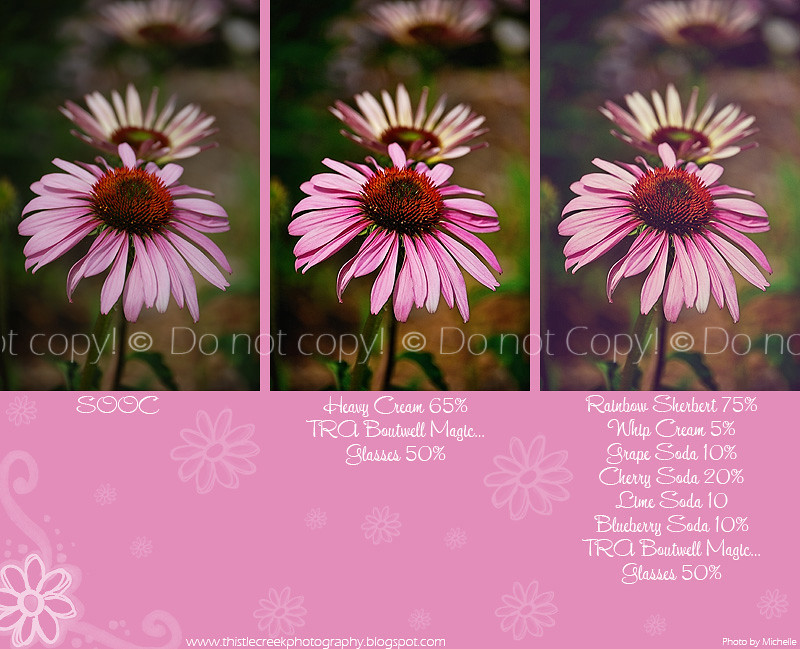
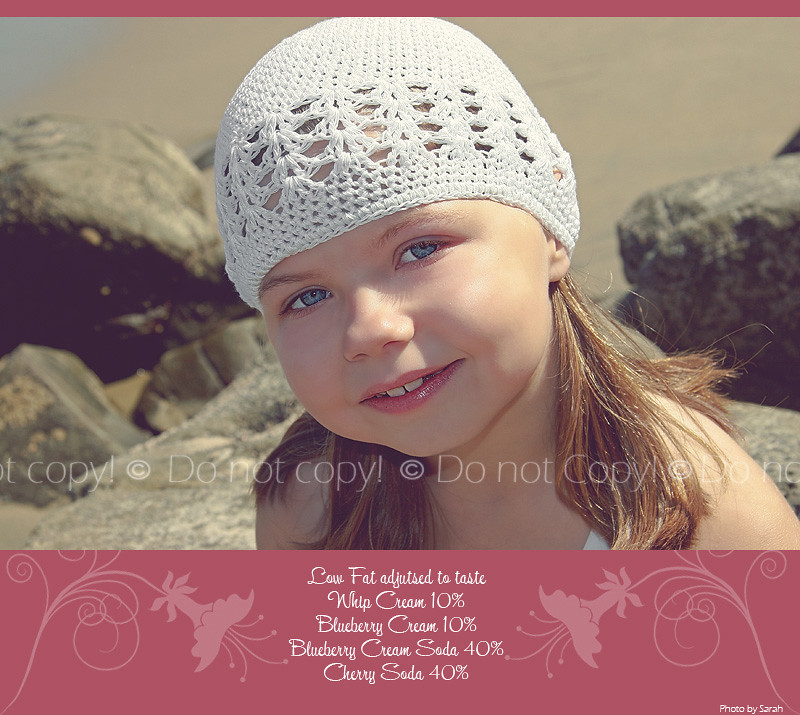
The first section is your "Base Ingredients". These are basic clean work flow type actions that will help boost contrast, color and a bit of sharpness. They will not add any haze or tones and as each image is different, these are meant to be adjusted to your liking! These should be run on your SOOC images as your primer to either edit clean or to go under your creative edits.
Base Ingredients contains 3 actions... "Low Fat" for those who shoot jpeg, do a lot in ACR or LR or just have that rockin SOOC image that doesn't need much. Half & Half is a little stronger with a little more umph and color boost. This is the one I use for my work flow action. Heavy Cream is pretty strong and will most likely need a fair amount of adjusting and possibly some masking of the skin. Do make sure that before running any of the "Base Ingredients" or any editing for that matter, that you have a good clean WB and your exposure is good. Any editing will only enhance problems in your photos. Here is a lovely shot from Anne Oliver of her beautiful daughter...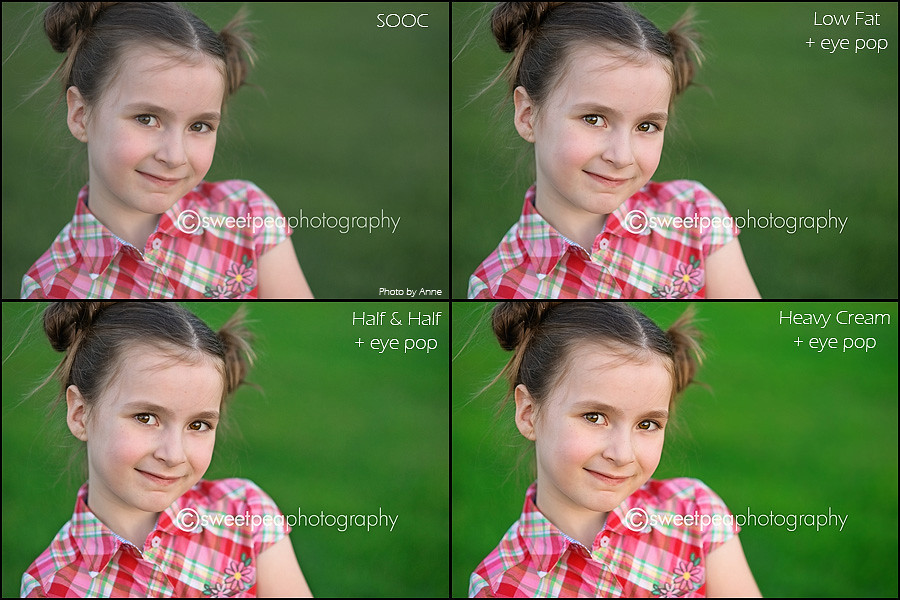
Then once you've ran one of the Base Ingredients {or your own work flow edits} you can move onto the best part...the creative fun!
The next section has 5 creative edits that will shift the tonal range of the image, add a bit of haze and add a bit of contrast. I call these "Desserts"! They are the most creative of the set, but still not a heavy handed action. You MUST flatten before running any in this section. One thing that was important to me as well when making this set was time! I wanted actions that didn't take forever to run but also wouldn't take forever to adjust! I spend too much time adjusting layers of actions and I wanted to minimize that for this set! So the actions in this section will leave you with 1 photo layer and a white layer mask above your background photo layer! Then you simply adjust the opacity and do any masking if necessary! Quick and easy. And for the most part, lowering the layer opacity should yield nice results. But if you would like a little more control you can use your history panel to go back to the step before "merge visible" and the layers will be opened for you or you can go back with the ctrl/alt/z button until the layers open. Usually 3 or 4 steps. Then you can adjust the layers and mask each layer to taste.
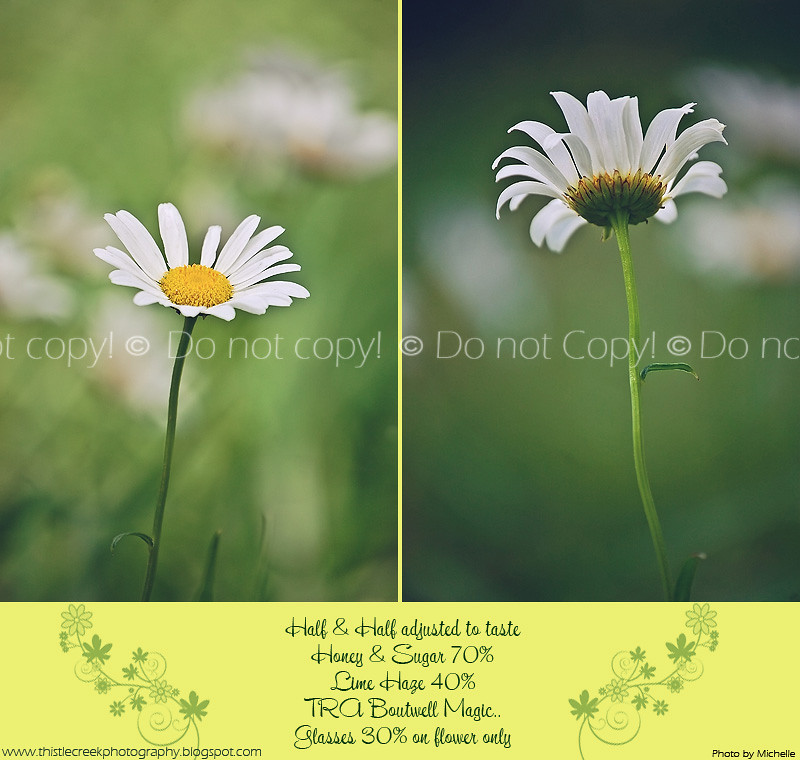
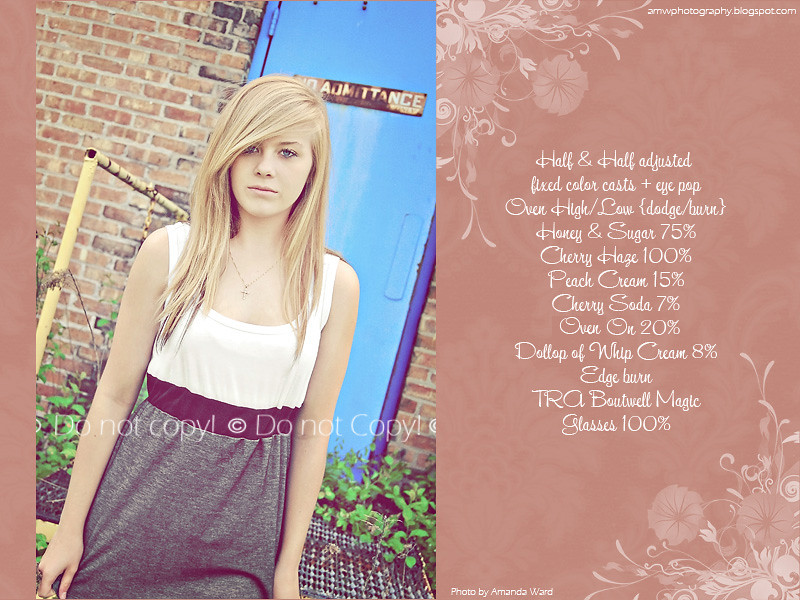
Ziggy~DE...Licious ~ The next two images were sent in by Janett McKee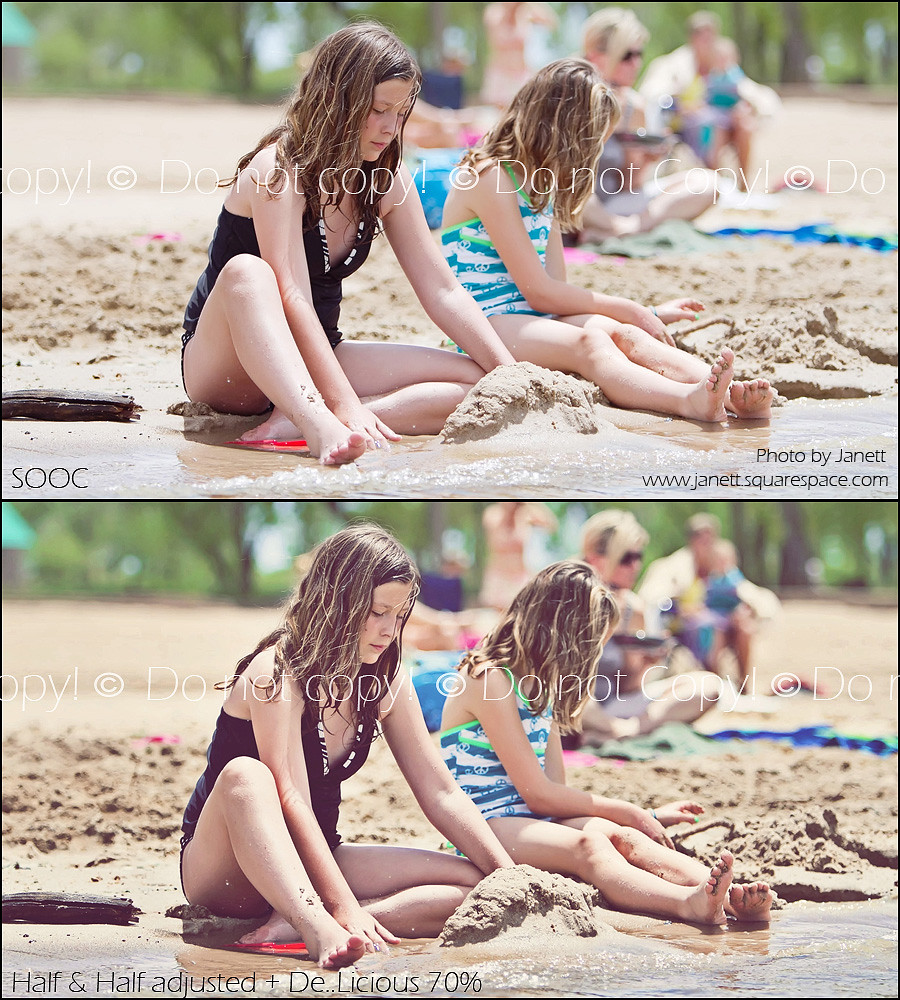
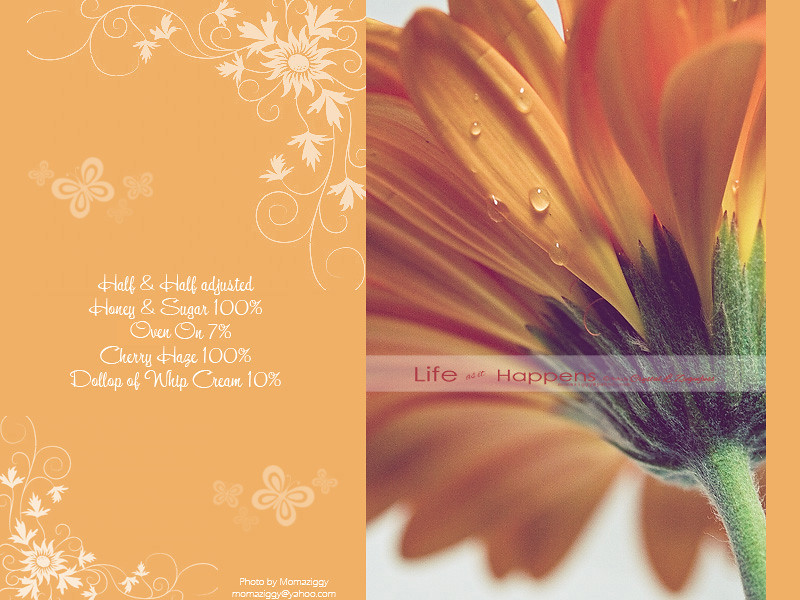
Could she be any prettier! I LOVE this shot! Honey & Sugar...
My little Nugget with some Strawberries & Cream...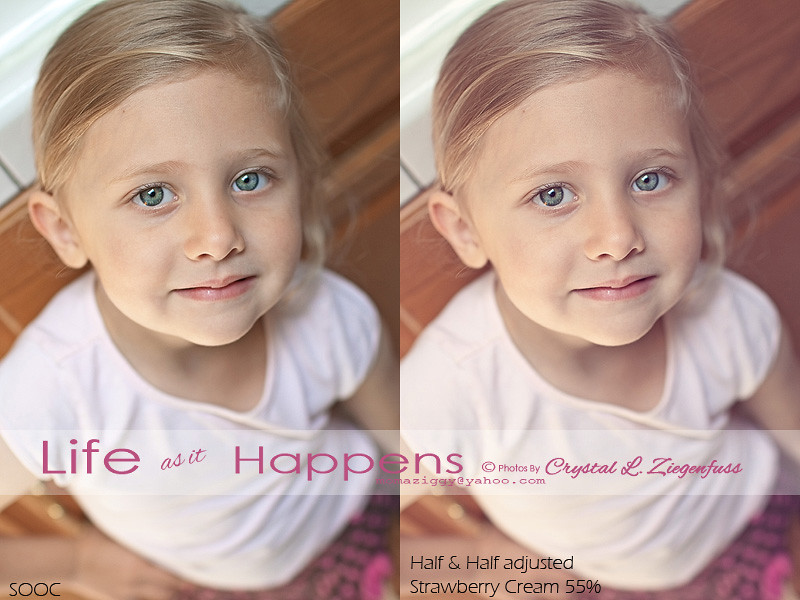
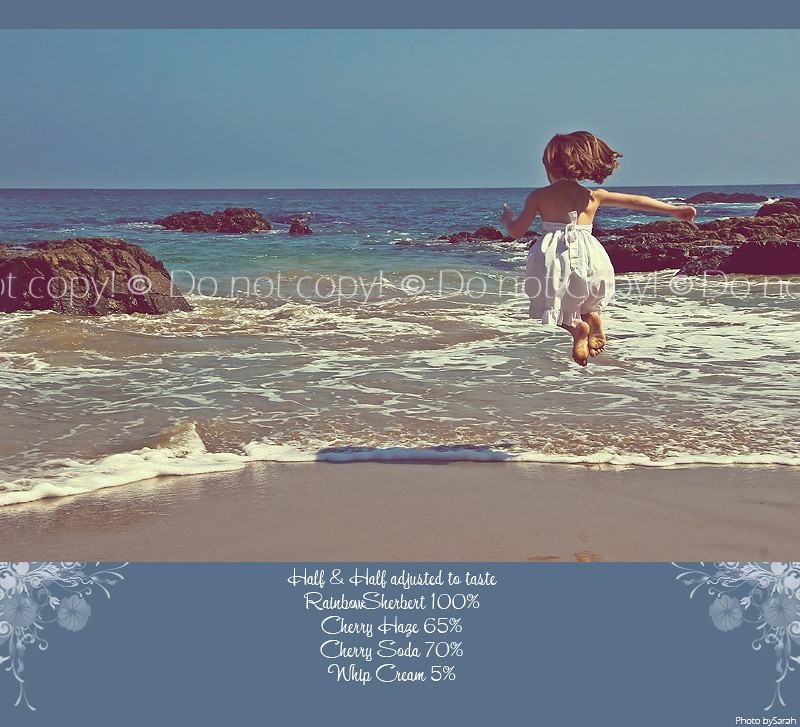
Rainbow Sherbert sent in by Carla on this soft yet sharp image...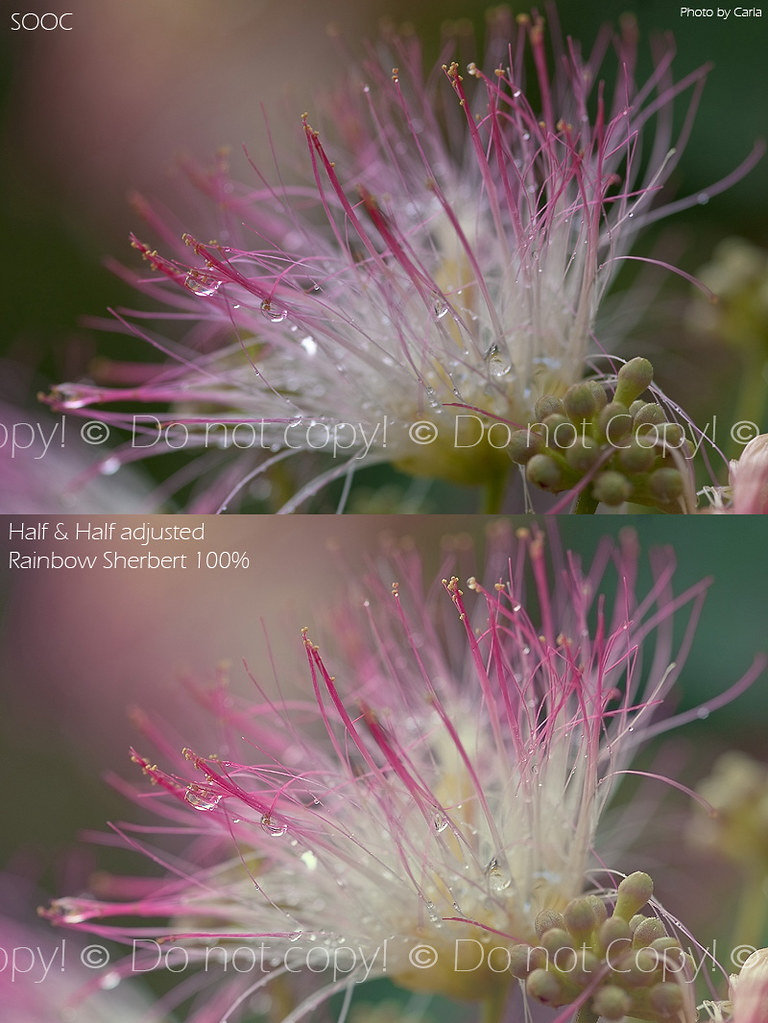
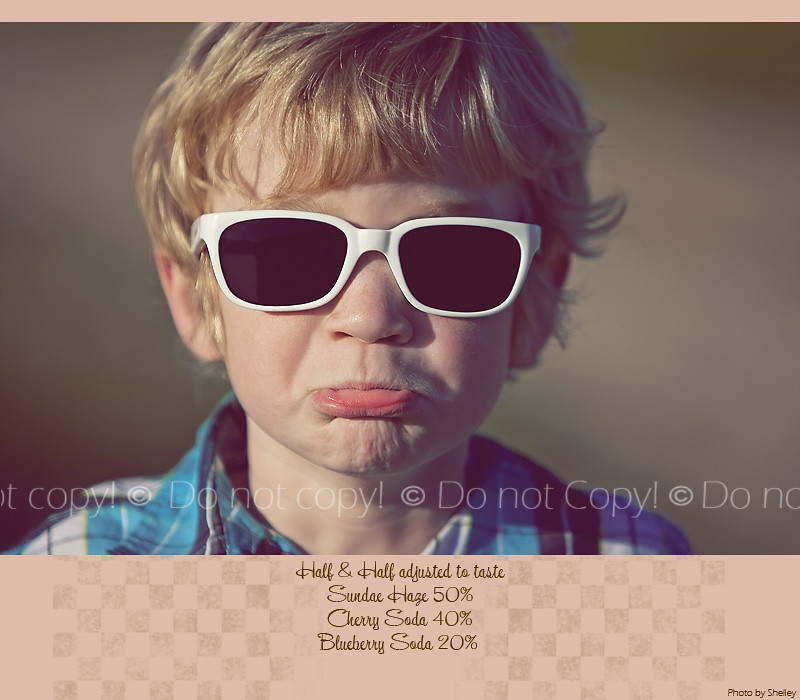
Warm Razzberry Pie on a warm sunny beautiful images sent in by Shelley Schaffer...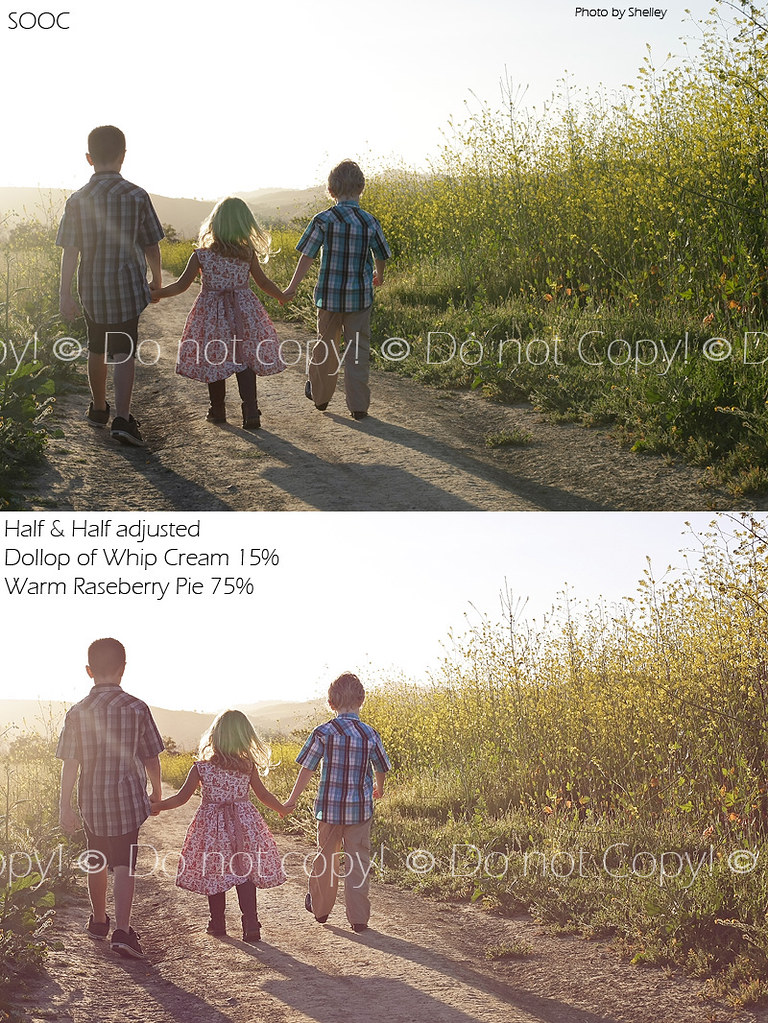
The actions in the next section are even lighter and great toppers to any edit. So I call them "Dessert Toppers". These are a simple 2 layer action that is grouped in a folder and can be run one on top of the other. No need to flatten before running any in this set! I often will run a couple of these on top of a Dessert and just play with the opacity of the folder. But you can open the folder and adjust the two layers if you so choose.
Here they are and this precious image was sent in by Farrah Jobling of her darling little Claire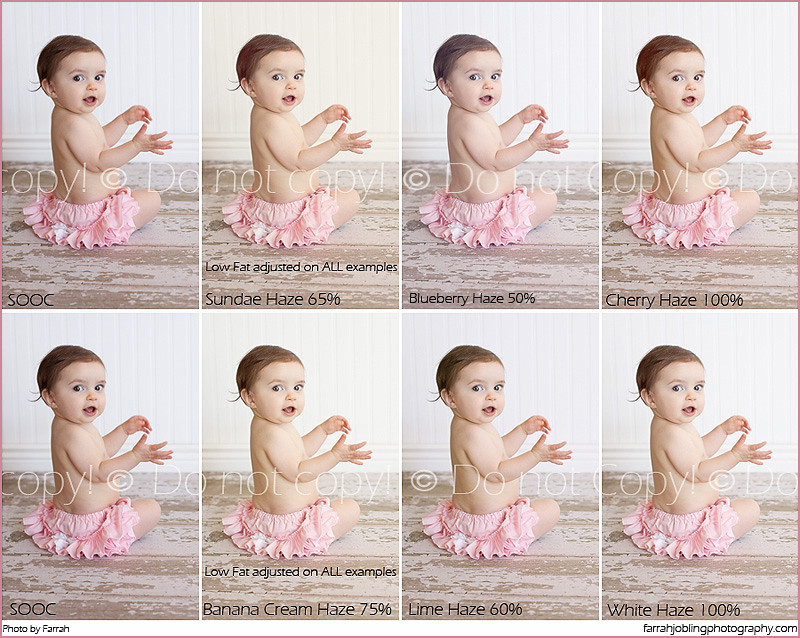
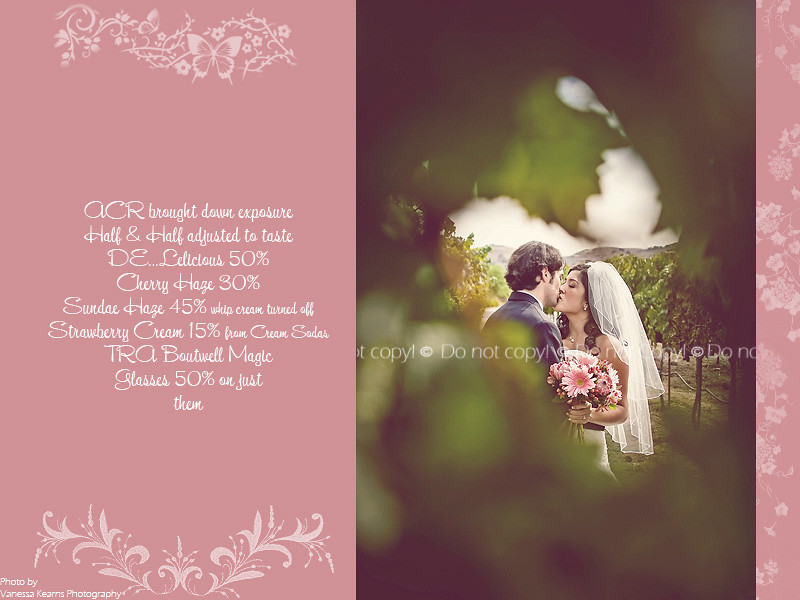
Also in this section is "Cream Sodas". This action will run 14 tones/tints for you to customize your image and top it off even more! Each layer is turned off and you can turn on any that strike your fancy for a different look every time. I also run this a lot and will turn on just a couple like the Cherry on top! :O) The creams will mostly effect anything lighter than 18% gray and are great for babies, newborns, kids...anything you want to be creamy! The sodas ROCK for urban, grunge or just that little extra something. The Sodas will tint your shadows and anything darker than 18% gray. I LOVE this look and use the Sodas a lot. And to spice it up the creams WITH the sodas give a great result. I will say that Cherry Soda is one of my FAVS...along with Cherry Haze from the section above! So def check these out and don't afraid to play and experiment!
First some examples from the Sodas...
The next two rockin little girl images were sent in by Nicole Matthews 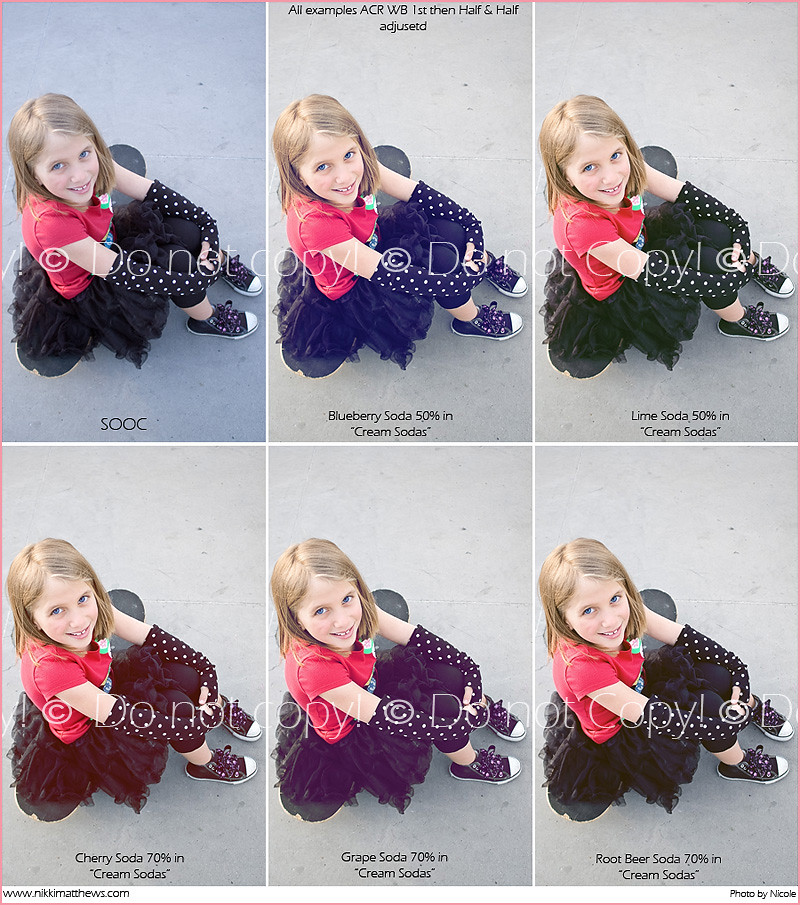
This is a Cream & a Soda combined and gives a very fun and unique look almost similar to my XP set I shared for free a while back! This one on it's own is a lot of fun as well!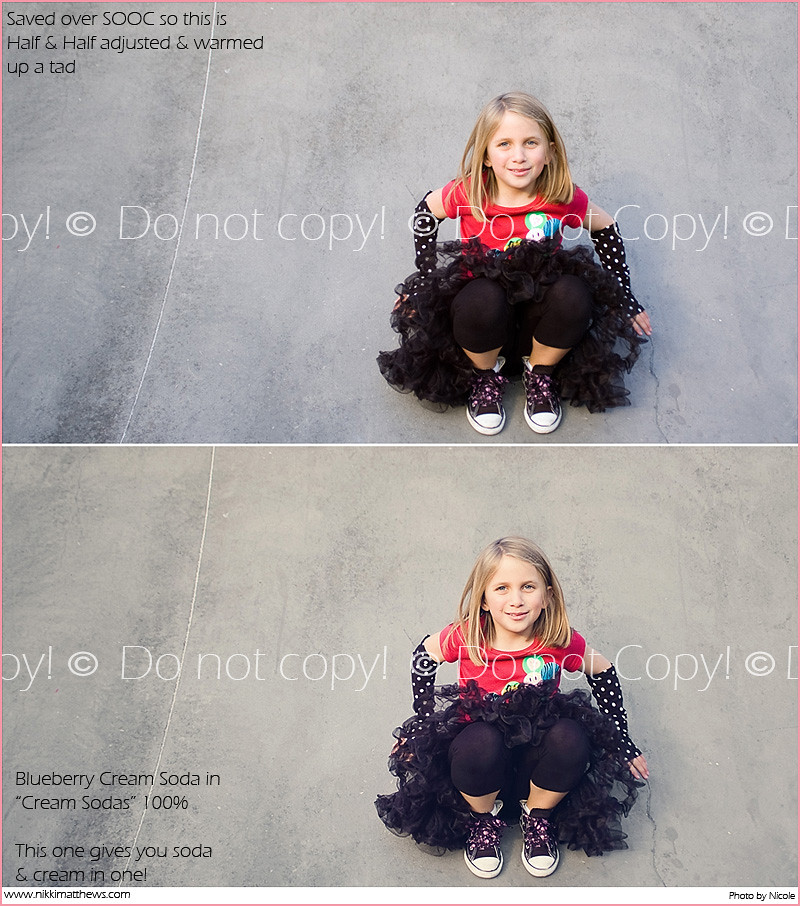
And now we have the creams. This beautiful image of these darling kiddos was sent in by Dana Fowler...
As you can see they are very subtle and you may have a hard time actually seeing a difference on here. Each one is just one layer at low opacity and these are meant to be in addition to the other actions, a final topper..like the cherry on top I was talking about versus them being used alone like in the sample. So keep that in mind!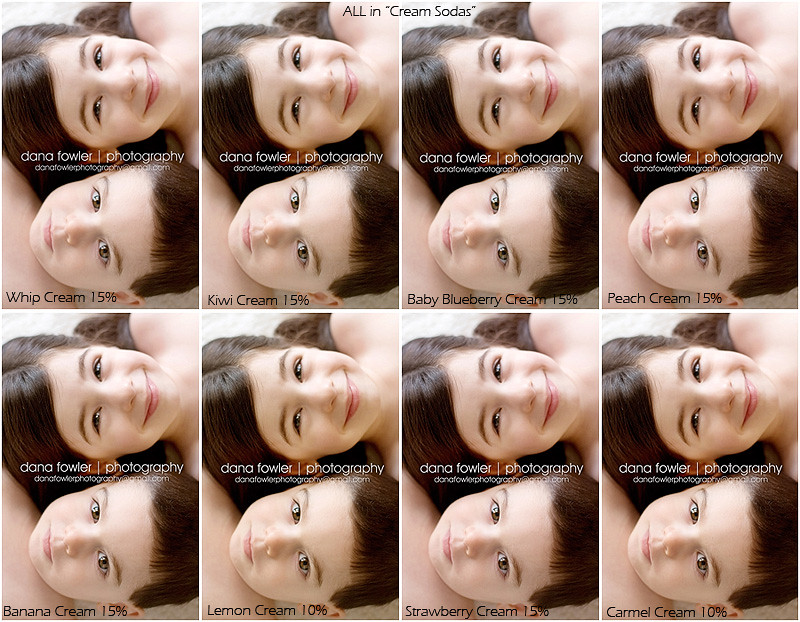
And I loved the light in this image so much that I had a clean play with it using the actions from this set and wanted to share that example as well!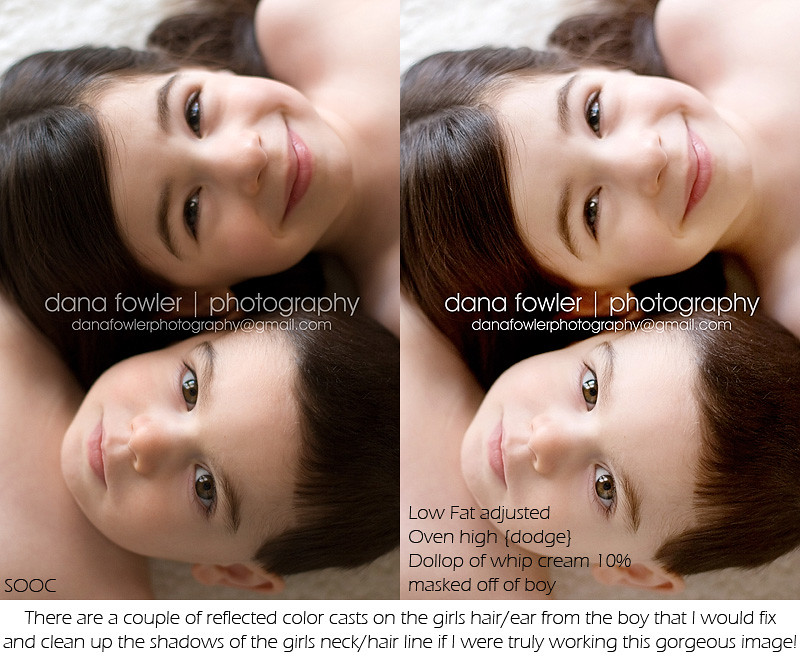
Now for even more fun stuff! The Blur/Grain section! I am VERY into the Tilt Shift lens look {t/s}. But sadly I'm on a poor sad little crop sensor! So until I can upgrade and get that expensive T/S lens, this is as close as I can get! So I included an action that I use a LOOOOT! It will do it's best to mimic a T/S lens. I also included a soft dreamy blur that mimics more of a soft focus effect for a pretty selective focus option. Both require you to paint with black where you want to remove the blur. I have two GREAT tips in the pdf that comes with the set on how to get the most natual look with the blurs. You MUST flatten to run the two blur actions.
This image...be still my heart was sent in by Taryn Lewis! So I had to run the T/S action on it! Here is my editing process for this image...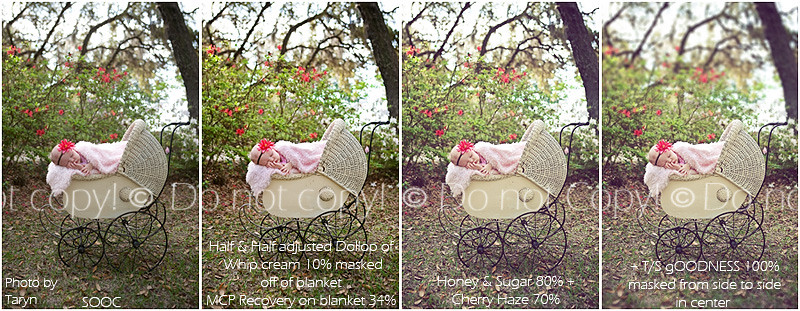
And so you can see the yummy goodness close up...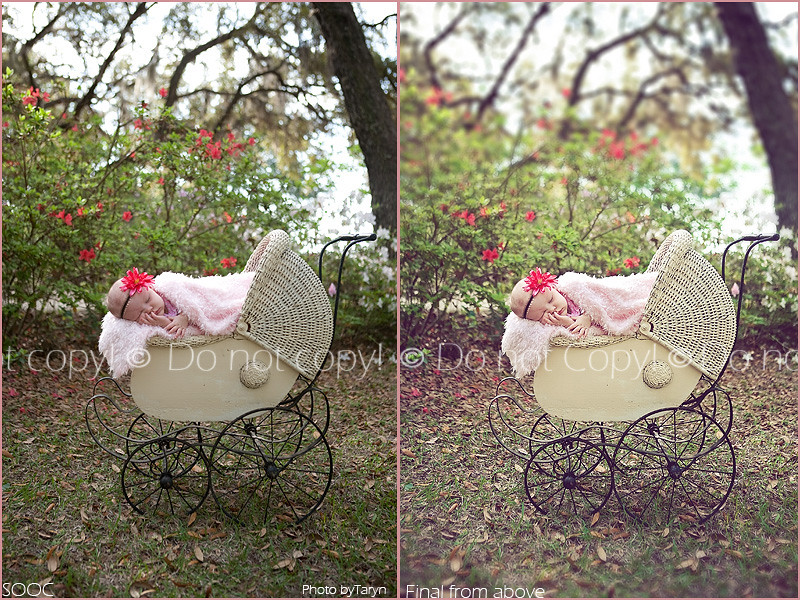
In this section as well is an action called "Sprinkles". It is a simple grain action that I love and does not require you to flatten before running. There is also a white layer mask for any masking needs and runs at 50% opacity. So you can raise or lower it to taste!
Then the last section is the Extras. Very simple, basic tools to help you get a little more out of your images. All of these actions can be run at any time, no need to flatten first! Dollop of whip cream rocks and I use it like crazy. It's basically a center light and you can raise or lower the opacity! Then there is Oven High/Low which is your standard dodge/burn action. To get more out of the dodge layer, change the blend mode to screen and to get more out of the burn layer change your blend mode to multiply. Be CAREFUL when doing any type of dodge/burn. Go light with the brush opacity for a natural look and use a larger soft edge brush so that it blends and enhances. The worst thing you can do is have your dodge/burn efforts wasted by screaming it's been done! It's takes practice and patient. It took me a while to get it! :O) Then you have a basic brighten and darken layer called Oven On & Oven Off!
So...if you are still with me and are as excited as I am about this set....lets get to the details! I'm not a fancy bloggin action seller as you all know! Lol! So I do not have a fancy blog like MCP or the other girls that allows you an instant download. I am sorry about that. But I do not plan on going into the action selling business, so I cannot justify paying for that option!
To order this set paypal $50 to momaziggy AT yahoo DOT com and make sure you check your email for your paypal account as that is where they will be emailed, along with the pdf file! Your actions will be emailed to you within 24 hours of your order, but in all honestly...most likely MUCH less time! You can email me anytime as well at momaziggy AT yahoo DOT com
So I think that's about it. Head over to 2Peas to see more examples I've posted, I'm on FB as well and let me know if you have any questions. I hope you buy them, LOVE them and get as much out of them as I do! :O)